


Use the map to find and locate properties spatially. For information on map functionality, see the following topics:
Using the Tools
You may interact with the map via different tools. Learn about the tools below to be able to use the map effectively:
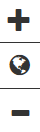
Navigation Tools
Navigation tools allow you to move around within the map. Learn how to use each tool below:

Full Extent
A map tool that will automatically zoom to the furthest extent. Zooming to full extent resets the map view so that every feature of every layer is contained within the visible extent.

Steps for zooming to Full Extent:
> Click the Full Extent button in the Tools pane.
Pan
A map tool that allows you to move up, down, left and right. Panning moves the map display around to show areas outside of the current viewing area without changing the scale of the map.
Steps for panning:
> Move the mouse over the map.
> Click and hold down the left mouse button.
> Move the mouse while keeping left mouse button down. The map will move with the mouse.
> Release the mouse button to complete the pan operation.
Zoom In
A map tool that allows you to zoom in to see more detail. When working with a map it may be necessary to zoom in to view an area in more detail.


Steps for zooming in:
> Click the Zoom In button in the Tools pane.
Zoom Out
A map tool that allows you to zoom out to see less detail. When working with a map it may be necessary to zoom out to see a larger area.

Steps for zooming out:
> Click the Zoom Out button in the Tools pane.
Zoom to your location
Use location services on your device to determine your location and then zoom in to that area on the map.


Steps for zooming to a next extent:
> Click the show your location button.
Other Tools
Tools that assist you in selecting features on the map. Selection tools allow you to make queries on features contained within the map. Learn how to use each tool below:

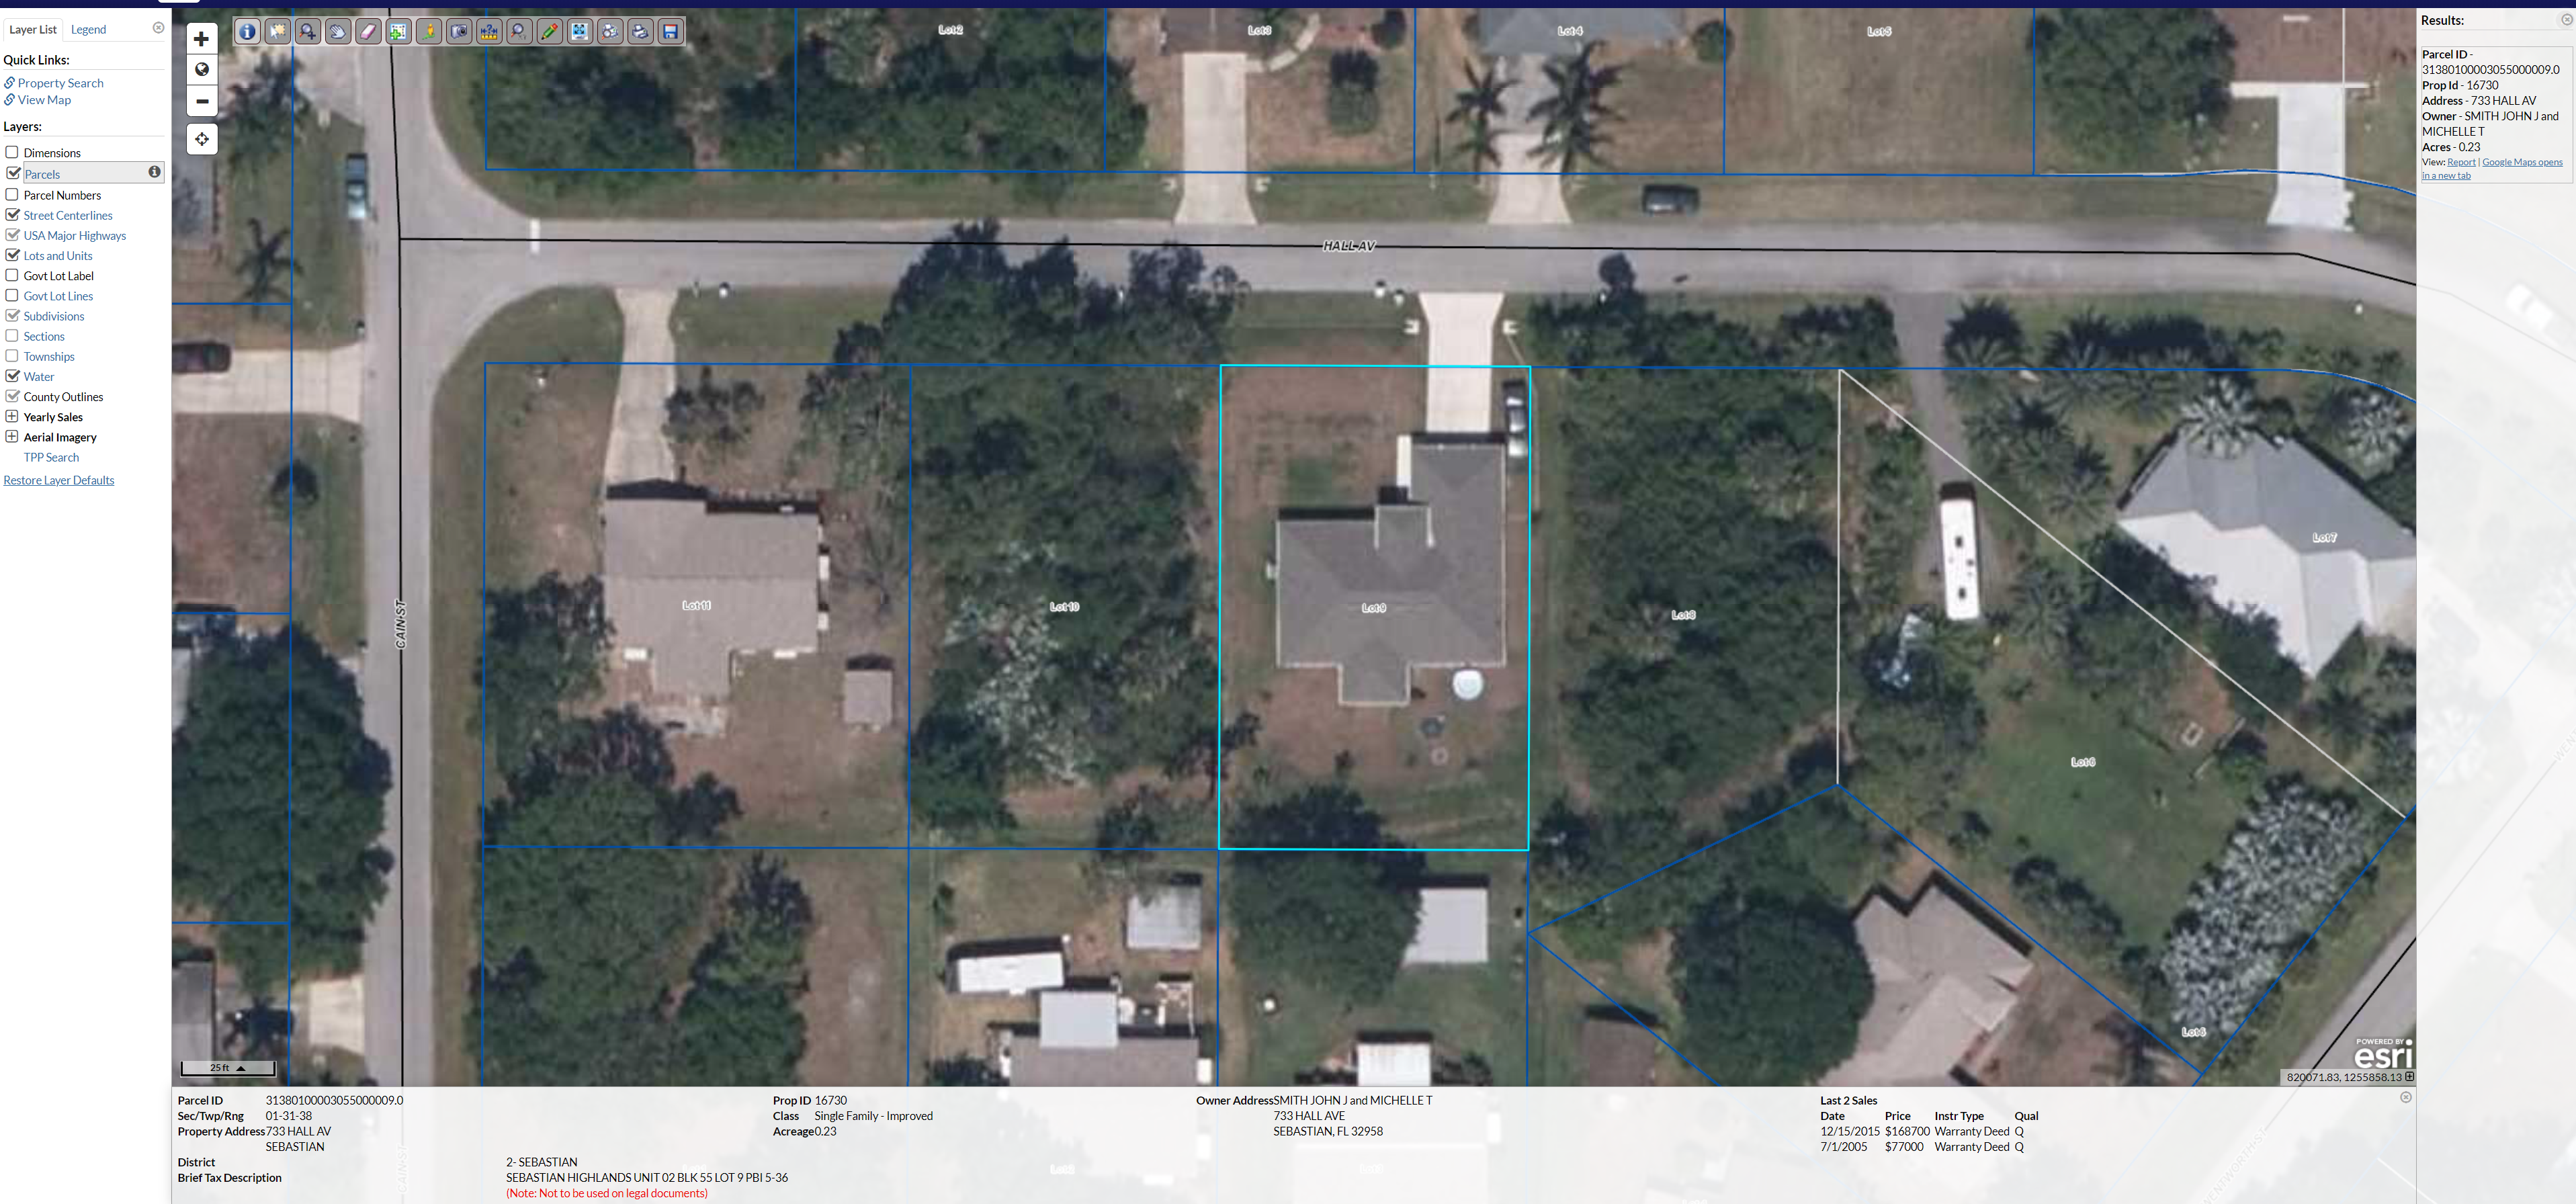
Identify Tool
This tool helps you identify a parcel by clicking, hovering, or there is a third option to turn off map tips.

Steps for selecting a feature by point:
> Click the Select By Point button in the Tools pane.
> Move the mouse over the map.
> Click a point you are interested in.
Note:
The functionality of this feature depends on the active layer. The default active layer is 'Parcels'; selecting a feature on the map by using Select By Point will select a 'Parcel' feature.
Holding the 'Shift' key while making your selection will not erase your previous selection. Use this technique to subsequently add features to your selection.
Selection Tool

Use one of the selection tools to select an area of the map.
Select by Rectangle, polygon, line, freehand, or point
A map tool that will select all the features that intersect the bounds of the selected area. Use this feature if you are interested in selecting a contiguous group of features on the map, or for selecting a single, point-based feature.
Zoom Toolbar

A map tool that will you to zoom in, zoom out, zoom to full extent, automatically zoom to the current selection, zoom previous and zoom next. Click Zoom To Selection if you want to zoom in and center the current selection set.
Clear Selection
A map tool that will clear your current selection. Click Clear Selection if you want to remove all features from your selection set.
![]()
Steps for clearing a selection:
> Click the Clear Selection button in the Tools pane.
Measurement Tools
Tools that provide measuring functionality. Map measurement tools allow you to measure distances and areas of spaces on the map. Learn how to use each tool below:

Measure Distance
A map tool that will measure the distance of a multi-point line. Use Measure Distance when you are interested in the length of a path of points.

Steps for measuring distance:
> Click the Measure Distance button in the Tools pane.
> Set the number of feet or acres that will equal one unit of your measurement.
> Click a point on the map. A pin will be dropped at this point and will represent the start of your measurement.
> Move your mouse to a new location on the map and click again to place the next pin.
> Repeat the previous step as many times necessary. At least two points are required for a valid measurement.
> Double click the left mouse button to end the measurement. The map will be refreshed and your measurement will be displayed.
Steps for measuring area:
> Click the Measure Area button in the Tools pane.
> Move the mouse over the map.
> Click a point on the map. A pin will be dropped at this point and will represent the start of your measurement.
> Move your mouse to a new location on the map and click again to place the next pin.
> Repeat the previous step as many times necessary. At least three points are required for a valid measurement.
> Double click the left mouse button to end the measurement. The map will be refreshed and your measurement will be displayed.
Tools to Print and Save
Tools that will assist you in printing or saving a map image. Printing allows you to persist and maintain a hard copy of a particular map of interest. Saving allows you to persist a soft copy of a map on your local hard drive. Learn how to use each tool below:

Printing
A map tool that will assist you in printing a map. Use Print to output your current map to a desktop printer.

Steps for printing:
> Click the Print button in the Tools pane.
> You will be redirected to a Print Preview page. Click print at the top of the page to initiate your browser's print dialog.
Note:
> Add notes to a map in the textbox labeled 'Notes' before printing.
> Selected parcels will be displayed underneath the map if any are available.
Saving
A map tool that will assist you in saving a map to your hard drive. Use Save if you want to save a copy of your current map on your computer's hard drive.

Steps for saving:
> Click the Save button in the Tools pane.
> You will be prompted by your browser to either open or save the file; choose 'Save'. Save the image on your computer's file system in the desired location.
Note:
The type of file the map is downloaded can be either JPG or PNG image file formats. The map engine responsible for rendering the maps on this website chooses which file format is most efficient.
Managing Layers
Learn about managing the different map layers. From the Layers tab, you can manage Layer Visibility, choose the Active Layer from the list of Selectable Layers, and view descriptions about each layer. For more information about managing layers, choose from the following topics:
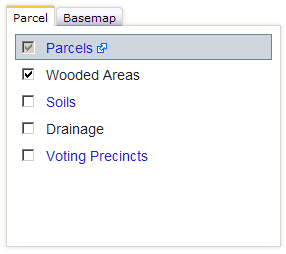
Layer Visibilities
Layer visibilities allow you to turn on and off certain layers. One of the things that makes Online Auditor's map different than many online maps (like Google Maps) is the ability to dynamically turn on and off layers. Some layers aren't turned on by default. In the example below, the Soils, Drainage, and Voting Precincts are all off by default. To toggle the layer visibility, click the checkbox in the front of the layer's name.
Steps to toggle a layer's visibility:
> Click the checkbox that corresponds to the layer whose visibility you want to toggle.
Note:
Some layers' visibilities are scale dependent. You cannot manage the visibilities of these layers until you are within the visible extent of the layer. In the example above, the Parcels layer is scale dependent. The checkbox is disabled because the map is not zoomed to an extent at which the layer can be visible.
Selectable Layers
Selectable layers are layers that have the ability to be selected and set as the active layer. In the example below, the Parcels, Soils and Voting Precincts are selectable layers and the Parcels has been selected as the Active Layer.

Steps for selecting the Active Layer from the list of Selectable Layers:
> Click on a Selectable Layer.
Results Section
Results from your selections and map interactions will appear on the right hand side of the map.
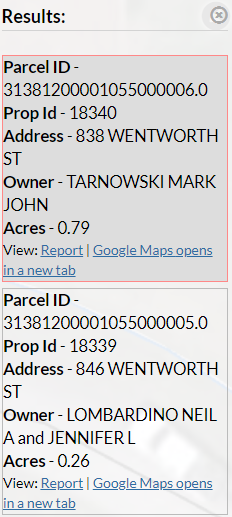
Steps for viewing selections:
> Once you've made a selection, information on the selected parcels will be returned to the results section.
> If you select a parcel from the results section, you can zoom and center the map on that particular parcel, view the property data report, or open that parcel in google maps.